

How to make soil blocks
Disclosure: This post may contain affiliate links. Learn more here.
This blog article will explain step-by-step how to make soil blocks, the benefits, troubleshooting, and some tips and tricks.
Have you heard of soil-blocking? Soil-blocking has been around for some time. Here on our homestead, this is a new concept. Subsequently, this year we are trying it because of all the benefits and success it has yielded for other homesteaders and gardeners.

Benefits
Soil-blocking uses fewer containers. Fewer containers mean less waste and less storage for starting seeds every year.
A seed planted in a soil block does not become root bound as it grows. Once the root system hits the edge of the soil block, it becomes air pruned.
What is air pruning? When a developing root is exposed to air, the root desiccates (becomes wholly dried out) and stops growing. However, when the roots stop growing, it does not mean they stop working. The energy redirected from producing roots strengthens the stalk and plant development, creating healthier, more robust plants.
Plants in soil blocks do not experience transplant shock or growth delays since they are not transferred from plastic containers into raised or ground garden beds. The seedlings do not experience root breakage since they aren’t jostled around when trying to get the plug out of the pot or tray. Seedlings in the blocks will immediately resume growing since they are not stunted in the transplant process. Thus, a sooner harvest!
Step-by-step guide on how to make soil blocks
Step One: Gather your tools for soil-blocking
This includes:
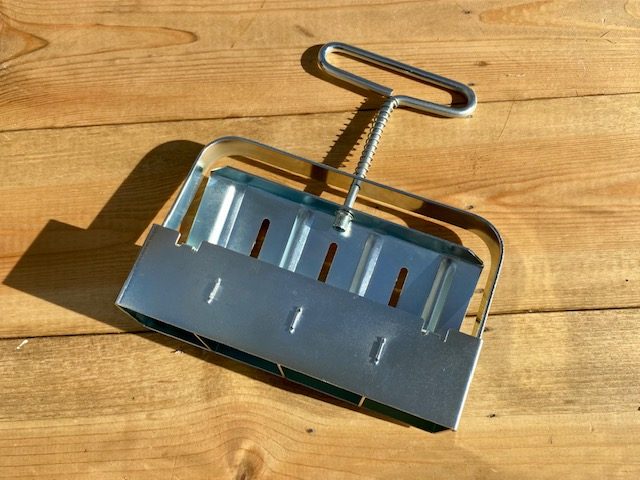
- Soil blocker
- Holed trays
- Solid bottom trays
- Soil mix medium
- Bucket (with water for rinsing the soil blocker)
- Water (For mixing the soil medium)
- Wheelbarrow or flat-bottom tub (to hold wet soil mixture)
- Shovel (or use hands for mixing)


Step Two: Mix your soil with water to create a brownie batter/mud pie consistency
This will take some practice. If your soil block is too dry, it will crumble and fall apart. In contrast, the soil block will not retain it's shape if completely saturated (sludge consistancy). Next, take a hand full of damp soil, and squeeze, excess water should run out, leaving a soil ball like a snowball.
More water can be added if the mixture is too dry and more soil is too wet. Play around with the consistency and practice making a few trays. It's possible to throw the soil blocks back into the tub if they need to be remade.
Step Three: Form the soil blocks
Tip: Dip the soil blocker into your bucket of water. This prevents the soil block from sticking inside the tool. This ensures it won't fall apart, and release easily into the tray.
Press the wet soil-blocking tool into the tub of wet soil mix, rotating your hands back and forth, compacting the soil into the blocker. Slide the soil blocker back and forth to smooth the bottom. This process may need repeated to fill the soil blocker completely.


Step Four: Releasing soil blocks into the trays
Tip: Layer a holed tray inside a solid-bottomed tray. Lifting the soil blocks out and bottom watering will allow the seedlings to soak up their required water. Bottom watering prevents flooding from the top, which washes away the soil since it’s not contained.
Place the compacted soil blocker flat onto the tray, and press down on the handle while pulling up the blocker simultaneously. This will push the soil blocks out of the bottom of the tool. A perfect soil block, “brownie,” as my husband calls them, will be in the tray.


That’s all there is to making soil blocks! This straightforward method that saves time and money for starting seeds and growing a garden to produce food for your family.
Some questions surrounding soil blocking:
What is the soil-blocking system?
The smallest soil blocker is a Micro 20. This tool makes 20 ¾” soil blocks. The next size up is the Mini 4 soil blocker, which makes 4 2” x 2” soil blocks. Alternative snap-in square ¾” dibblers are available to replace the 5/8” dibblers in the Mini 4.
A working nesting system, the Micro 20 soil block fits snuggly into the Mini 4 soil block. The largest soil block, the Maxi, which is 4” x 4” and has a 2” permanent dibbler. The Mini 4 2” soil block fits into this size.
How do you water soil blocks?
A layering tray system lets you lift the soil blocks without disturbing them too much. Fill the solid tray with enough water to cover the bottom completely.
How many soil blocks fit in the tray?
Depending what size of soil block, alongside tray size, will determine how many soil blocks will fit. We used 1020 trays we purchased from the Greenhouse Megastore, successfully filling it with 50 2x2 inch soil blocks.
What is the best mix for soil blocking?
The best soil mix comes down to personal preference. Many recipes exist online that you can make yourself. Some find it easier to purchase premixed soil starting mediums. Test several recipes or premixed soils to discover what works best for you and your needs. There is no “one-size-fits-all” when it comes to soil-blocking or seed-starting. Experiment, learn, and have fun!
To watch how to make soil blocks in action, play the video below and follow along as you make your own! Practice makes perfect!
Let us know if you have tried making soil blocks to start seeds with and any other tips or tricks you might have!
