

Planting Seed Potatoes
Potatoes are one of the most versatile and widely consumed crops worldwide. Planting seed potatoes in trenches is an effective method that promotes healthier root growth and increased yields. In this comprehensive guide, we will take you through the step-by-step process of planting potatoes in trenches, nurturing their growth, harvesting at the right time, and storing them correctly for long-term use.
Selecting Seed Potatoes:
Choose certified disease-free seed potatoes from a reputable source. Select varieties suited to your climate and desired use (e.g., baking, boiling, or storage). Cut larger seed potatoes into smaller pieces, ensuring each piece has at least two "eyes" or sprouts. Allow the cut surfaces to dry and form a callus before planting.
Preparing the Site:
- Before planting seed potatoes, choosing the right location and preparing the soil is crucial. Follow these steps:
- Select a sunny spot with well-drained soil.
- Loosen the ground using a garden fork or tiller, removing any rocks, weeds, or debris.
- Incorporate organic matter like compost or well-rotted manure to improve soil fertility and drainage.
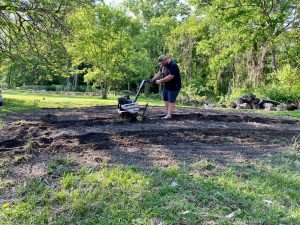
Creating Trenches:
Creating trenches for planting potatoes helps create a favorable environment for root development and makes it easier to harvest. Here's how to do it:
- Dig parallel trenches, approximately 8-10 inches deep and 2-3 feet apart.
- Space the trenches at least 2-3 feet apart to allow adequate room for the plants to grow.
- Consider planting potatoes in raised beds or containers if you have limited space.
Planting:
- Place the seed potatoes with the sprouts facing upward, spacing them about 12-15 inches apart along the trench.
- Cover the seed potatoes with 3-4 inches of soil, partially filling the trench.
- As the plants grow, gradually fill in the trench with soil, leaving a few inches of foliage at the top exposed.
Care and Maintenance:
To ensure healthy potato plants and maximize yields, take the following steps:
- Water consistently, providing about 1-2 inches of water per week.
- Mulch around the plants to conserve moisture and suppress weed growth.
- Monitor for pests and diseases, taking prompt action if necessary.
- Hill up the soil around the base of the plants to encourage tuber formation.
Harvesting:
Harvesting potatoes is an exciting and rewarding process. Here's how to do it:
- Wait until the potato plants have flowered and the foliage starts to yellow and die back.
- Carefully dig around the plant using a garden fork or shovel to avoid damaging the tubers.
- Gently lift the plants and remove the potatoes from the soil.
- Allow the potatoes to air-dry for a few hours before storing or using them.
Storage:
Proper storage is essential to prevent spoilage and prolong the shelf life of your harvested potatoes:
- Cure the potatoes by storing them in a cool, dark, and well-ventilated area for 1-2 weeks. Curing helps toughen the skin and enhances storage life.
- Choose a storage location with a temperature between 35-40°F (2-4°C) and 85-95% relative humidity.
- Store potatoes in well-ventilated containers, such as burlap sacks, baskets, or wooden crates.
- Regularly inspect stored potatoes and remove any that have blemishes or rot spots.
In conclusion, planting potatoes in trenches is a tried-and-true method that promotes healthier growth and higher yields. Following the steps outlined in this comprehensive guide, you'll be well-equipped to cultivate and harvest delicious potatoes. Remember to choose the right location, prepare the soil, diligently care for the plants, and store your harvested potatoes properly. Then, enjoy the satisfaction of growing your potatoes and relish their versatility in various culinary creations throughout the year!
